A Synology NAS is a useful way to store files, documents, photos and backups in one place but opening the NAS through a web browser every time can take extra time. If you use Windows, there is a simple way to mount Synology NAS in File Explorer. You can connect a shared folder to File Explorer and work with it like a local folder on your computer.
This is helpful when you regularly move files, save office documents or manage folders stored on your NAS. Instead of searching for the NAS through a browser, you can open File Explorer, select the connected drive and start working.
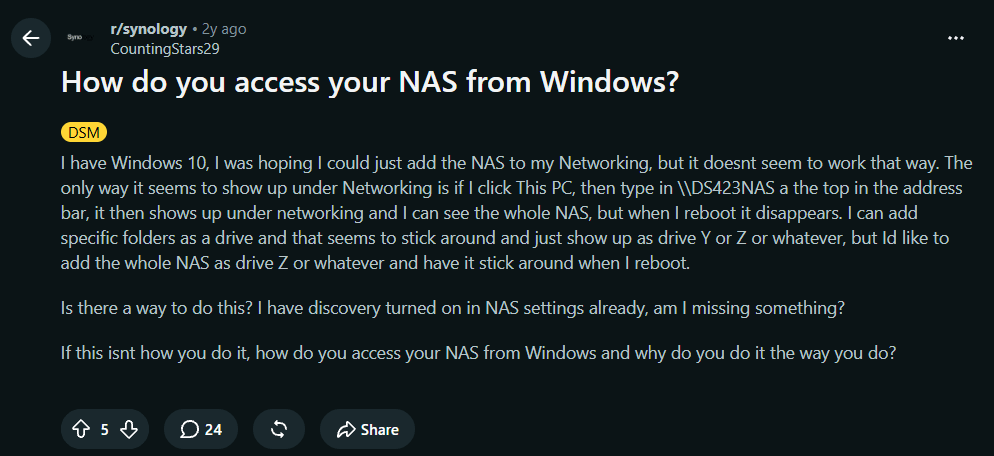
A Reddit user recently brought up an important point in the r/Synology community:
In this guide, we will explain how to mount Synology NAS on Windows using two methods. One is a professional solution and the other one is a manual solution that uses the built-in Windows File Explorer option. Both methods have different uses, so you can choose the one that fits your setup.
Benefits of Mounting Synology NAS in Windows File Explorer
Mapping Synology NAS as a network drive makes it easier to access and manage files stored on your network storage. Instead of opening the NAS web interface every time, you can work with shared folders directly from File Explorer. This is useful for both personal and office work, especially when multiple files need to be accessed regularly.
Easy File Access
Once you mount Synology NAS on Windows, its shared folders become available in File Explorer. You can open documents, view photos and manage folders without visiting the DSM interface each time.
Save Files Directly to NAS
You can save documents, videos and other files directly from File Explorer. The changes will be automatically saved to your Synology NAS. It is useful when you want to access the same file from multiple computers connected to the network.
Better File Management
When you mount Synology NAS as a network drive, you can use normal File Explorer actions such as copy, paste, rename, move and delete. You can also create folders and organise your files without switching between different applications.
Access Shared Folders Easily
A NAS contains separate folders for different users, projects, or types of data. Mapping a shared folder to Windows makes these locations easier to find. You can assign different drive letters to different shared folders, making file organisation simple.
Useful for Regular Work
If you frequently work with files stored on your NAS, mounting it as a network drive saves repeated navigation. You can open File Explorer, select the mapped drive and start working with the files.
How to Mount Synology NAS in File Explorer?
Download and install the Prapl Cloud Mount Manager on your Windows Pc. The software provides a simple way to mount Synology NAS in File Explorer. Enter your Synology NAS login details and access it through Windows File Explorer. It allows you to browse folders, open files and manage your NAS data from your computer. You do not need to download every file in advance. Files are accessed when you open them and changes are automatically updated in the Synology NAS when you save them.

Steps to Mount Synology NAS on Windows
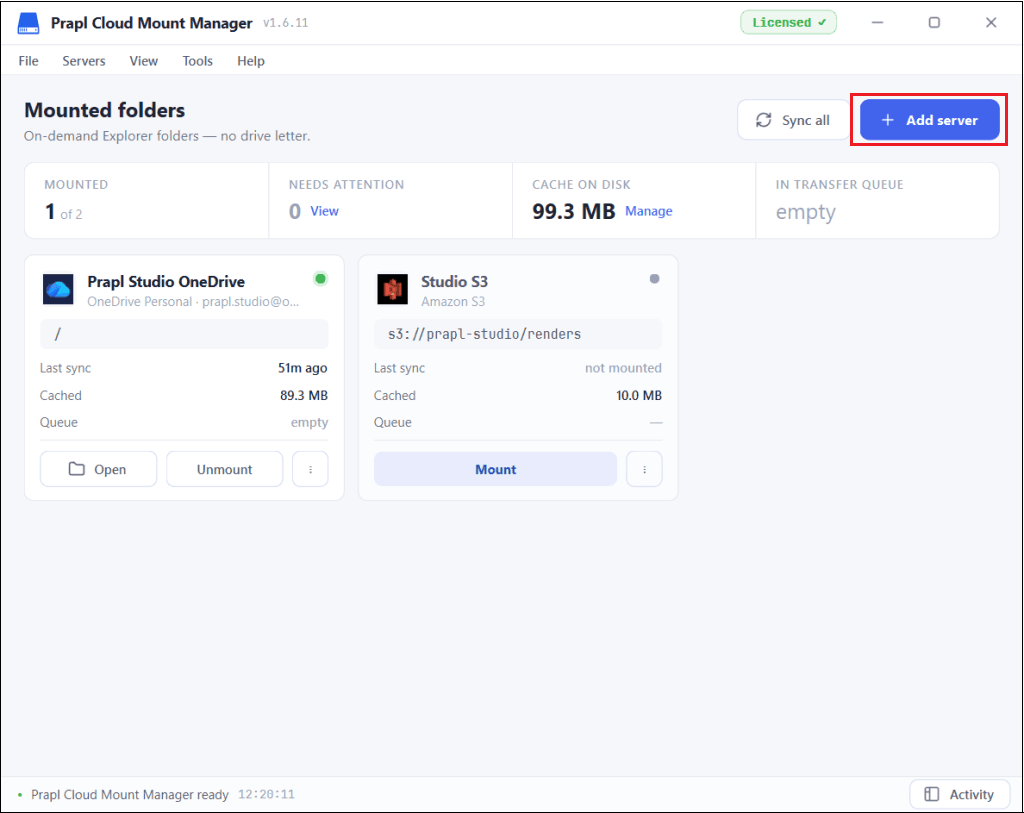
1. Run the tool on your Windows PC and click on Add Server.
2. Choose Synology NAS from the given options.
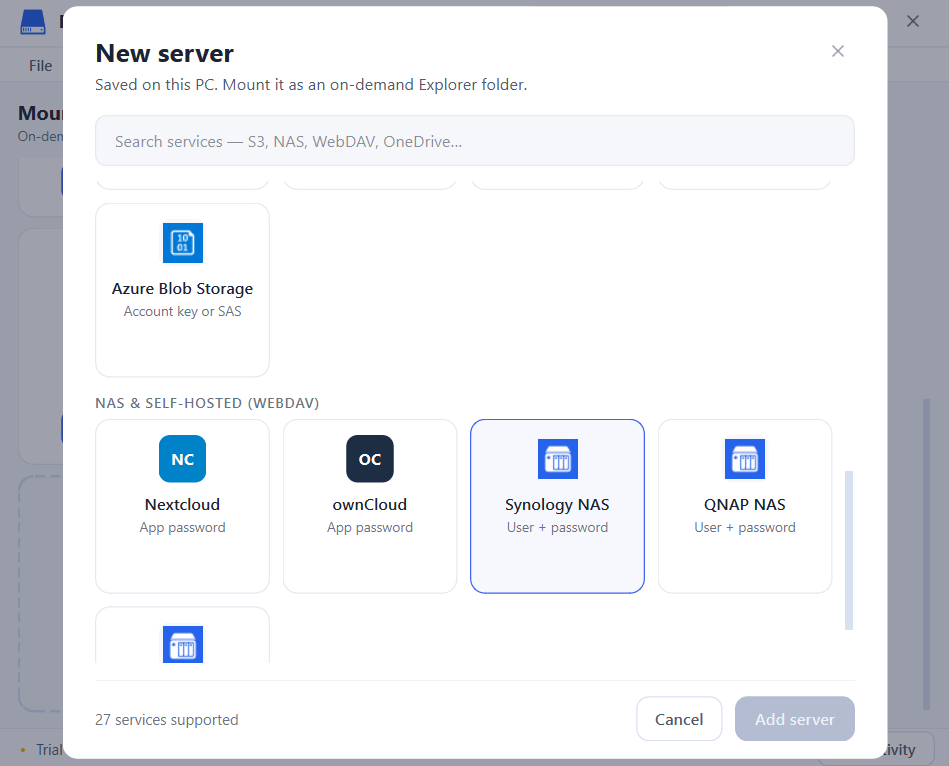
3. Enter the login details of your Synology NAS and click Add Server.
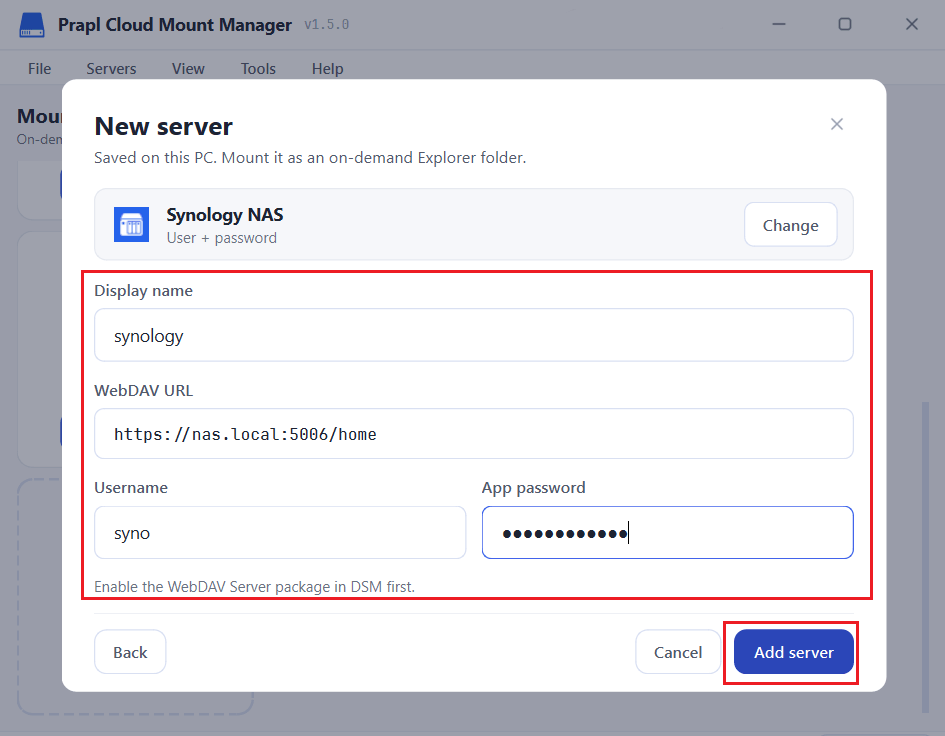
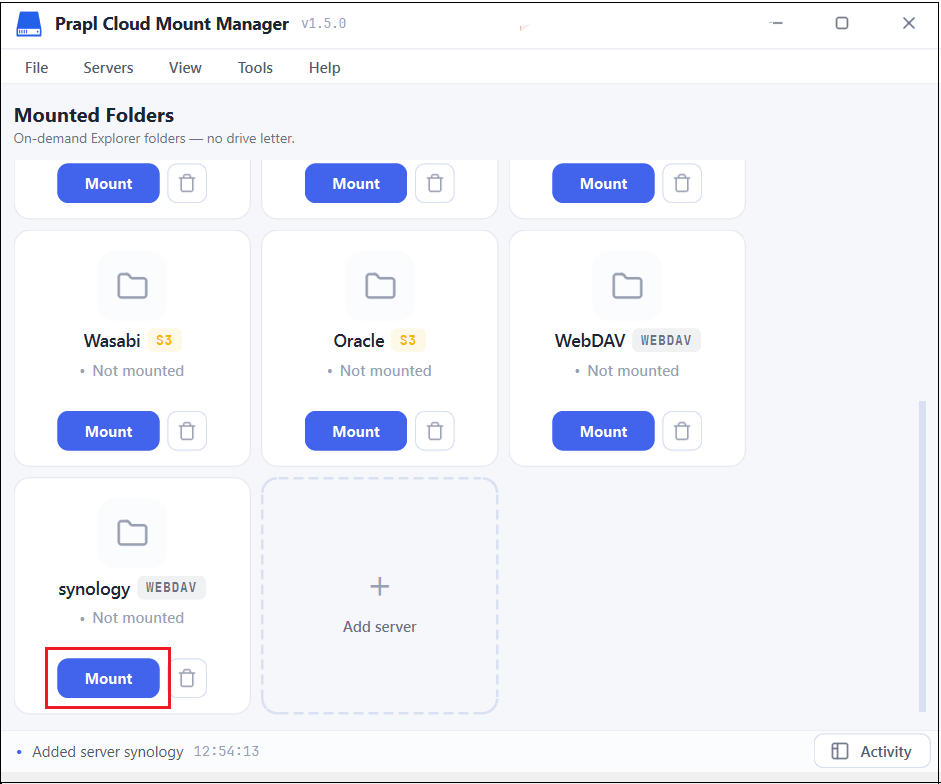
4. Once it is added, click on Mount.
5. Now the Synology NAS appears in Windows File Explorer.
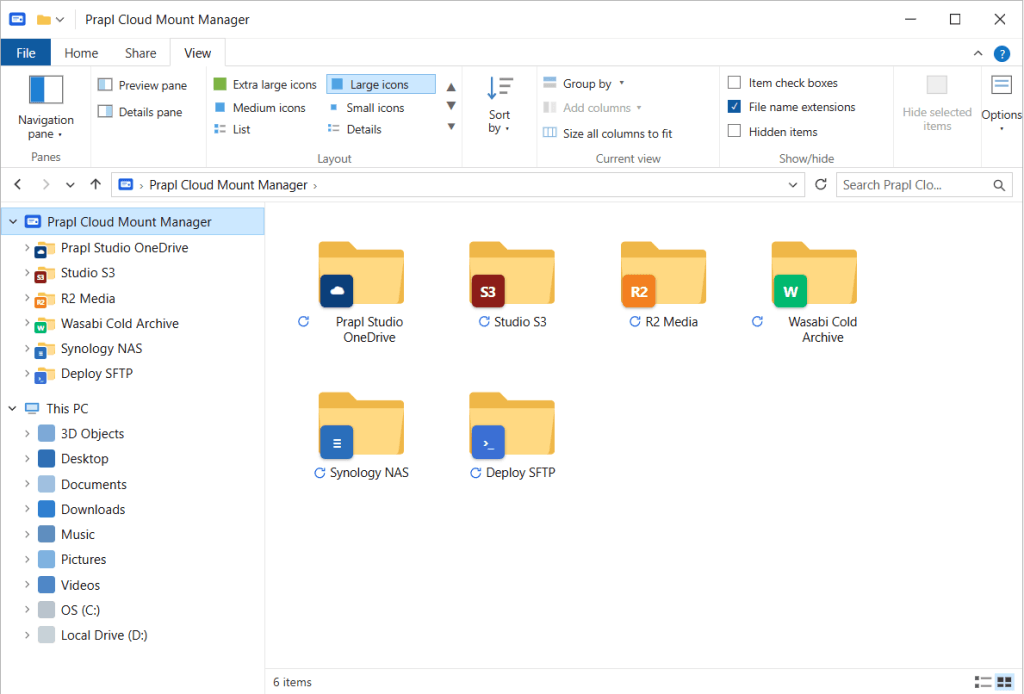
You can access and manage files using normal Windows file operations without opening a web browser for every task.
How to Map Synology NAS as a Network Drive on Windows?
Windows includes a built-in map network drive feature that lets you connect a Synology shared folder to a drive letter.
Follow these steps to mount Synology NAS in File Explorer:
1. Open File Explorer On your Windows PC.
2. Select This PC from the left panel and right-click on it.
3. Choose the Map Network Drive option.
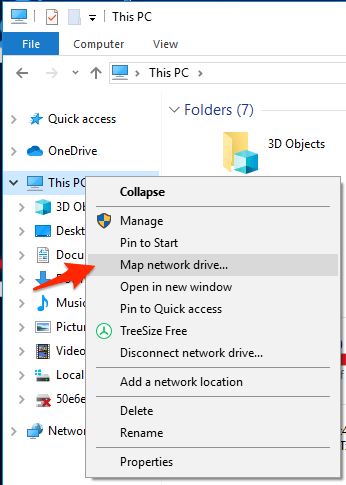
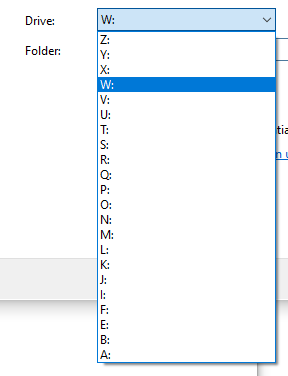
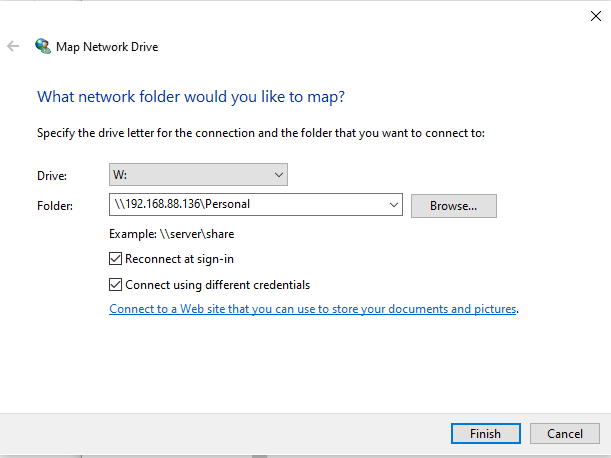
4. A new window will open. Select a drive letter in the Map Network Drive window.
5. In the Folder field, enter the path of your Synology shared folder.
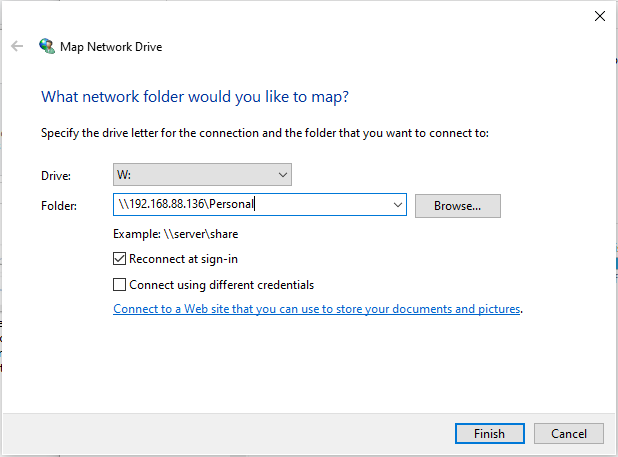
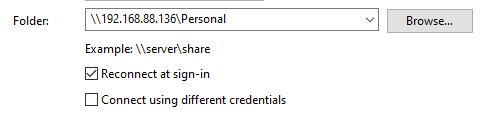
6. Enable Reconnect at sign-in if you want Windows to reconnect the NAS drive whenever you sign into your computer.
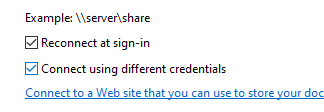
7. Choose Connect using different credentials if your NAS uses a different username and password.
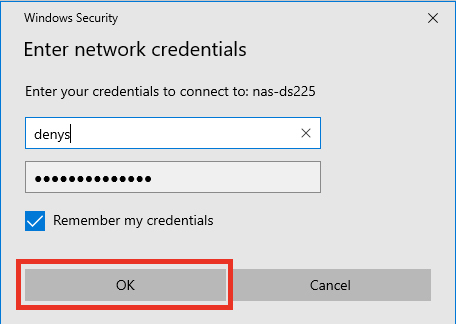
8. Click Finish to start the connection. Windows may ask for your Synology NAS username and password.
9. Enter the login details and click OK. Open account that has permission to access the shared folder.
10. After successful authentication, Windows will connect to the shared folder.
Open File Explorer again and select This PC. Now, you can see your Synology shared folder under Network locations with the drive letter you selected. You can copy files, create folders, rename documents and save files directly to the shared folder.
Conclusion
In this post, we have explained how to mount Synology NAS in File Explorer on Windows using two different methods. The manual Windows approach is suitable if you simply want to map a Synology shared folder as a network drive using SMB. The software can be considered when you want a dedicated desktop application for accessing and managing Synology NAS file through File Explorer, along with direct file mapping, editing and saving. So the choice mainly depends on how you want to access and manage your Synology NAS rather than whether files need to be downloaded first.