

WebDAV lets you access files stored on a remote server as if they were sitting on your own computer. But typing a URL into a browser every time is not convenient. The better way is to mount WebDAV in File Explorer. Once you map it, the remote WebDAV folder shows up under This PC. You can then copy, open, edit and save files directly, exactly the way you work with files on your hard disk. There is no need to download files or use a web browser. This makes mounting WebDAV on Windows a practical choice for cloud storage hosting servers and shared team folders. In this article, you will learn two easy way to mount WebDAV as a local drive on Windows.
So let’s look at both.
Method 1. Mount WebDAV in File Explorer Manually
Windows has a built-in Map network drive feature that can connect to a WebDAV URL. Follow these steps for mapping WebDAV on Windows:
1. Open File Explorer and click on This PC from the left panel.
2. Click Map network drive in the top ribbon.
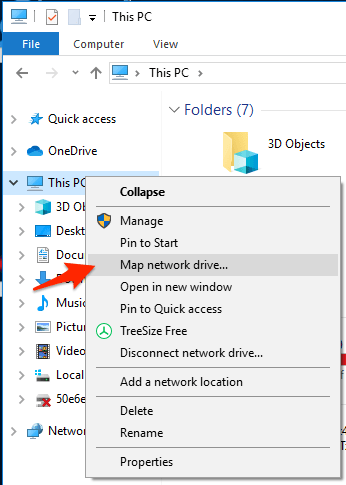
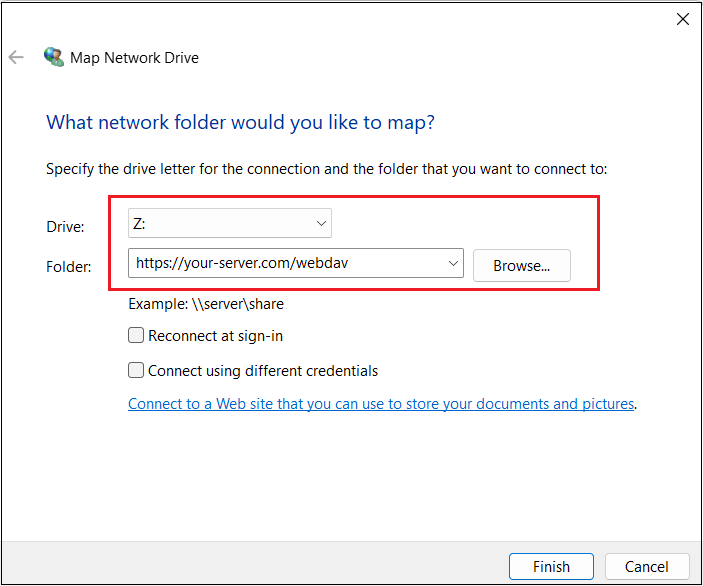
3. Choose a drive letter you want to assign to the WebDAV storage.
4. In the Folder field, enter your WebDAV URL.
5. Tick Reconnect at sign-in so the drive stays mapped after you restart.
6. Choose Connect using different credentials if the server needs a username and password.
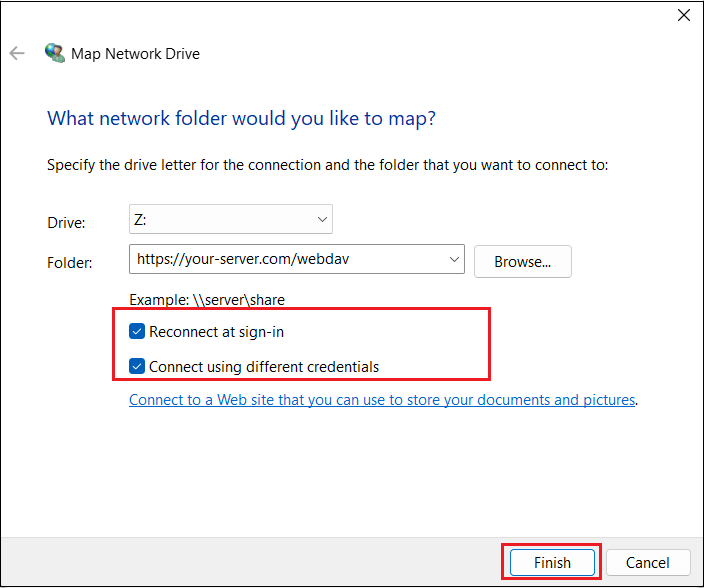
7. Click Finish, then enter your WebDAV username and password when prompted.
Once done, your WebDAV storage will appear in File Explorer as a mapped drive.
Things to Keep in Mind with the Manual Method
The manual method works, but it has a few limitations you should know about:
- The WebDAV client service must be running on Windows. If it is stopped, the mapping will fail.
- Windows open struggles with HTTP WebDAV and may block it unless you edit the registry.
- Large files can be slow, and Windows has a default file-size limit for WebDAV transfers.
- The connection can drop or time out and you may need to reconnect manually.
If you run into these issues or want a smooth experience, then using the second method is the best option.
Method 2. Map WebDAV in File Explorer Using Prapl
The manual method depends on Windows’ built-in WebDAV support, which is where most of the problems come from. The Prapl Cloud Mount Manager solves this by handling the WebDAV connection on its own, instead of relying on the Windows WebClient services. It can easily mount WebDAV in File Explorer and keeps that connection stable in the background. So the drive behaves like a real disk.

The tool does all the technical work for you. You just enter your WebDAV details once and it takes care of authenticating and reconnecting whenever needed. There are no services to start, no registry values to change and no commands to type.
Steps to Mount WebDAV in Windows File Explorer
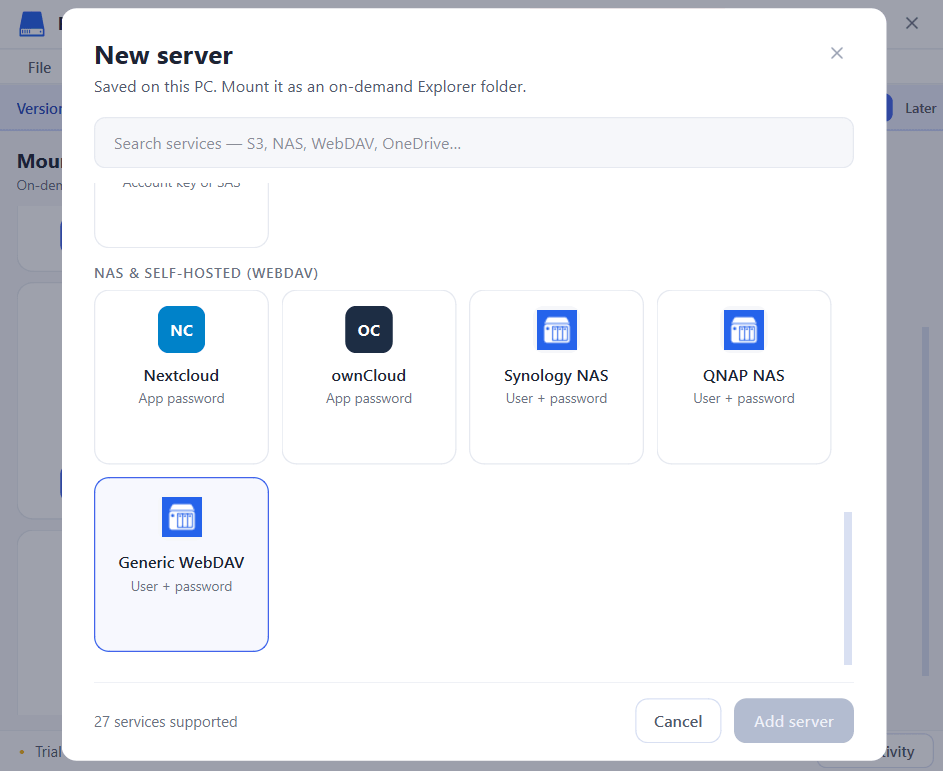
1. Launch the tool on your Windows PC and click on Add Server.
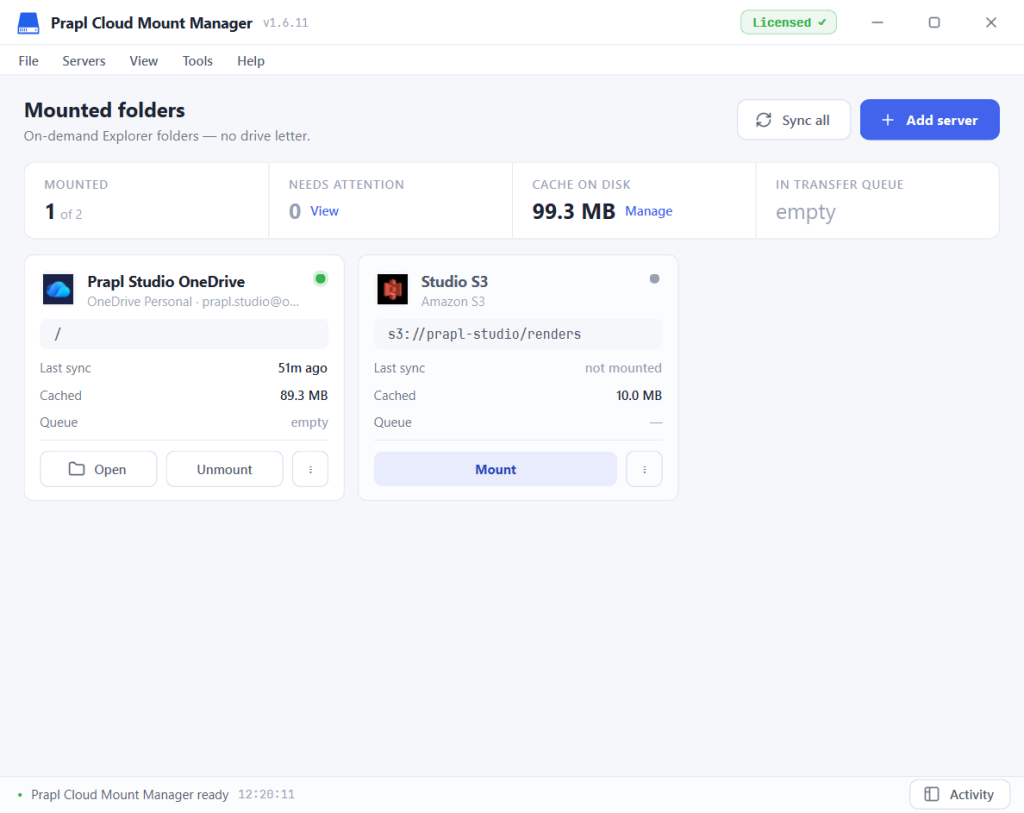
2. Choose the WebDAV option.
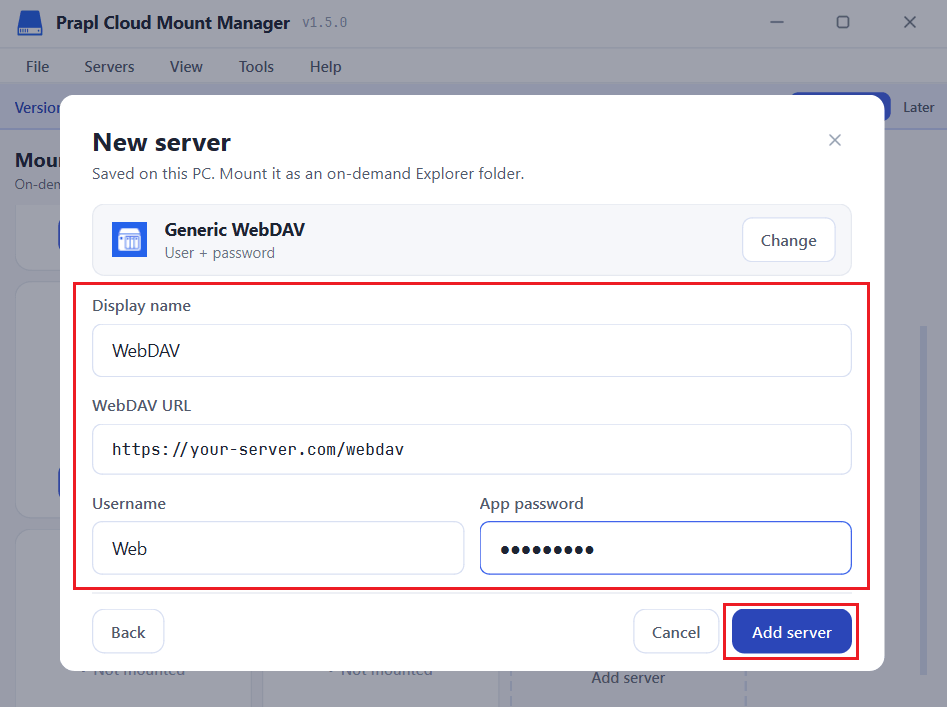
3. Enter the WebDAV URL, username and app password. After that, click on Add Server.
4. Once added, click on Mount.
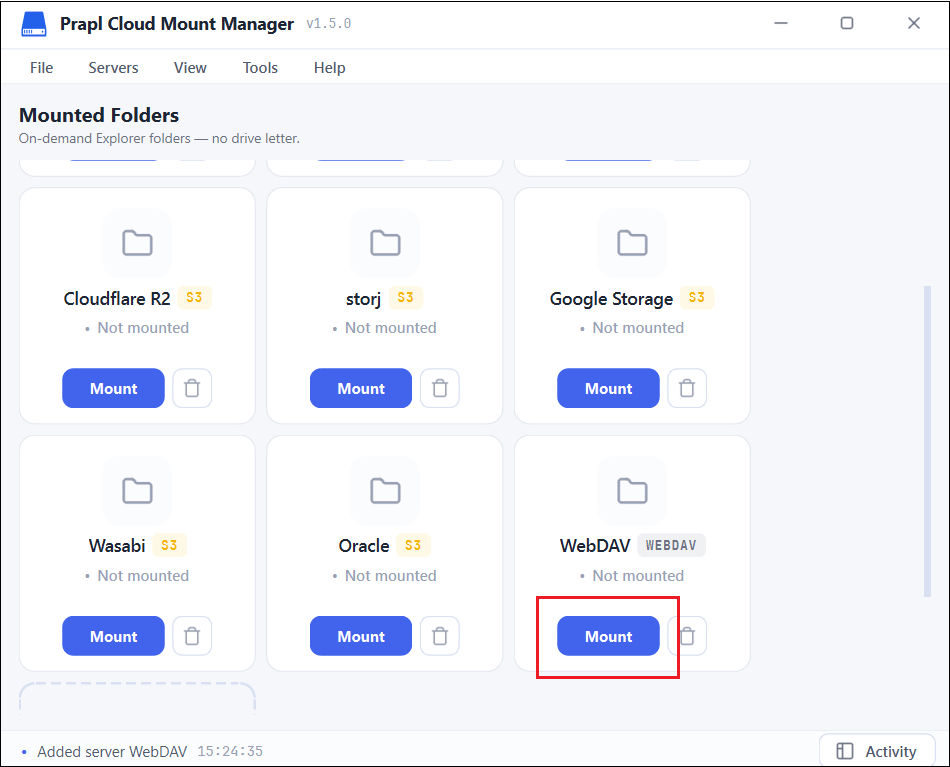
Done! Your WebDAV storage will instantly appear in File Explorer under This PC as a local drive. You can open, edit and save files directly from here. The changes will automatically be saved to the server.
Why Use Prapl Cloud Mount Manager to Mount WebDAV on Windows?
The software gives you a more reliable way to mount WebDAV as a local drive as compared to the manual setup:
- No need to start or fix the WebClient service
- Works smoothly with secure WebDAV connections
- Handles large files without the usual Windows size limit
- Keeps the drive connected and reconnects automatically
- Simple user interface no command required to set up
Conclusion
Mounting WebDAV on Windows turns remote storage into a drive you can use just like any local folder. The manual map network drive is fine for quick, basic connection, but it can be limited by Windows Services, file size caps, and dropped connections. For a stable and hassle-free setup, the professional utility is the easier way to mount WebDAV in File Explorer and keep it running reliably. Choose the method that fits your needs and enjoy accessing your WebDAV files directly from File Explorer.