
When files are stored in a Cloudflare R2 bucket, Windows does not show up that bucket alongside This PC, Downloads or other local drives. To access the data, you normally need to use the Cloudflare dashboard. This works for occasional storage management, but users who regularly upload, download or organise R2 files may prefer to access the bucket from the Windows file system.
By mounting Cloudflare R2 in Windows File Explorer, the remote bucket can be connected to a location on your computer. This gives you a direct path to the stored file through Windows Explorer, while the actual data remains in cloud storage. In this article, you will learn how to mount Cloudflare R2 in File Explorer using a manual approach and a dedicated mounting tool.
What Does Mounting Cloudflare R2 Mean?
Cloudflare R2 is an object storage service. Data is stored inside buckets and each file is treated as an object. It is commonly used for storing backup images, videos, application file, archive logs and other unstructured data. Mounting does not mean downloading the complete auto bucket to your hard drive. It means creating a connection between Windows and the remote storage so that you can access the bucket through a selected folder.
Why Mount Cloudflare R2 in File Explorer?
Connecting R2 to File Explorer can change how you interact with cloud-stored files. Rather than treating the bucket as a separate web-based storage location, it becomes part of your regular Windows File Workflow.
- Open R2 alongside local files: The connected bucket can be accessed from the same place as other Windows drives and folders.
- Move files between locations more easily: You can work between a local folder and the connected R2 location without manually downloading files first.
- Manage large groups of files: Buckets containing images, backups, documents or application file can be browsed through the familiar File Explorer interface.
- Use common Windows file operations: Depending on the connection permission, you can copy, move, rename and delete supported file through File Explorer.
- Reduce browser-based file management: Routine tasks do not require opening the Cloudflare dashboard every time you need to check or manage a file.
There are two different ways to mount Cloudflare in File Explorer. One is a manual solution and the other is a professional utility. We will discuss both methods in detail. Let’s get started!
Method 1. How to Map Cloudflare in File Explorer?
Windows does not directly mount Cloudflare R2 as a network drive, you need an application that understands the R2 S3-compatible API. The manual setup generally involves configuring an S3-compatible connection and then using software that supports file-system access.
Before starting, collect the required R2 connection information from your Cloudflare account.
Step 1. Select R2 Bucket
Sign in to your Cloudflare account and open the R2 connection. Select the existing bucket you want to connect to Windows.
Step 2. Generate Access Credentials
Create API credentials with the permission required for your work. The connection normally requires an Access Key ID and Secret Access Key.
Step 3. Get the S3-Compatible Endpoint
Cloudflare R2 provides an endpoint that S3-compatible applications use to communicate with your storage. Copy the endpoint details required by the application you plan to use.
Step 4. Configure S3-Compatible Client
Install software that supports S3-compatible storage and add a new connection. Enter the R2 endpoint, access credentials and other required settings.
Step 5. Select the Bucket and Configure File Access
Choose the bucket you want to access. Depending on the software, you may need to configure additional settings before the storage can appear as a drive or file-system location.
Step 6. Access the Connected Storage
After completing the setup, connect to the R2 bucket and verify that you can view the stored object.
The main limitation of this method is that the process can vary significantly depending on the application. You may need to understand connection settings, API credentials, endpoints and file system configurations separately. Some S3 clients also focus mainly on uploading and downloading files rather than providing direct File Explorer access.
Method 2. How to Mount Cloudflare R2 in Windows File Explorer?
The manual method requires you to configure an S3-compatible connection yourself and the available features depend on the application you choose. This can involve working with multiple settings before getting the R2 bucket accessible through Windows.
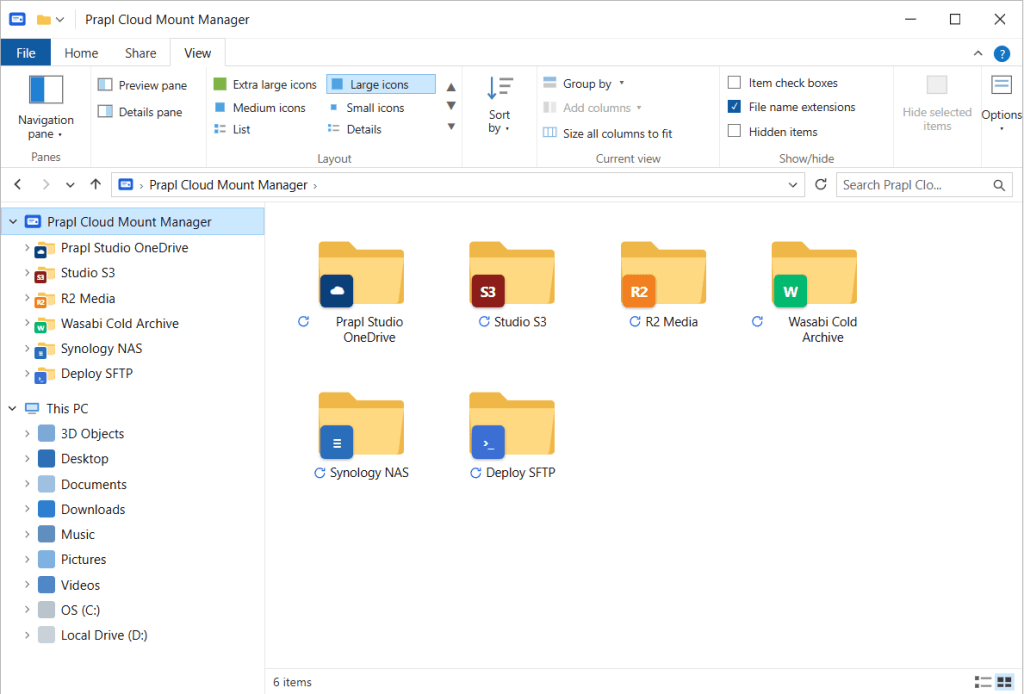
Prapl Cloud Mount Manager simplifies this process by providing a desktop-based setup for connecting Cloudflare R2 to File Explorer. You add the required R2 connection details to appear on your Windows computer. The software handles the connection so the storage can be accessed from File Explorer.

Steps to Mount Cloudflare R2 as Windows Drive
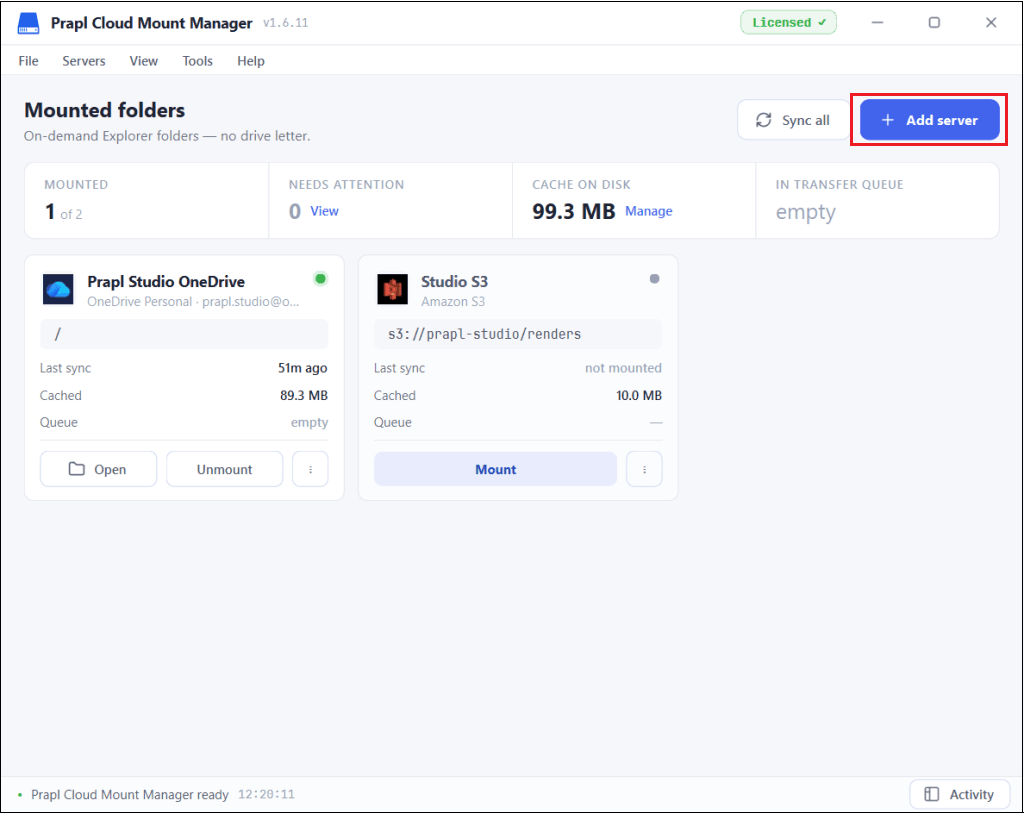
1. Launch the software and click on Add Server.
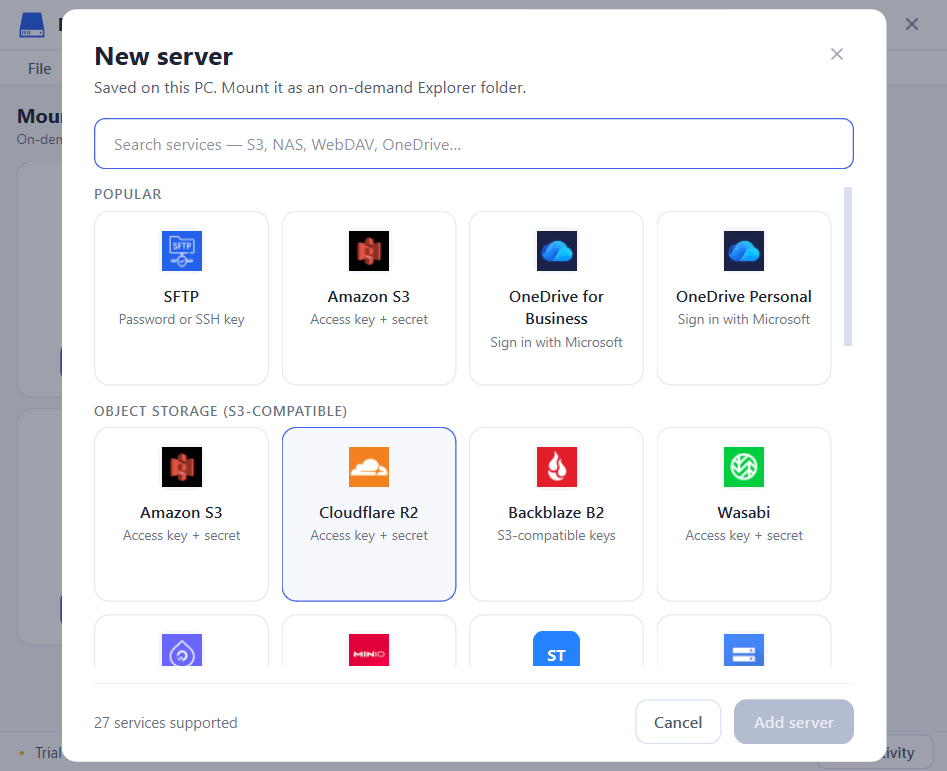
2. Choose Cloudflare R2 from the Object Storage options.
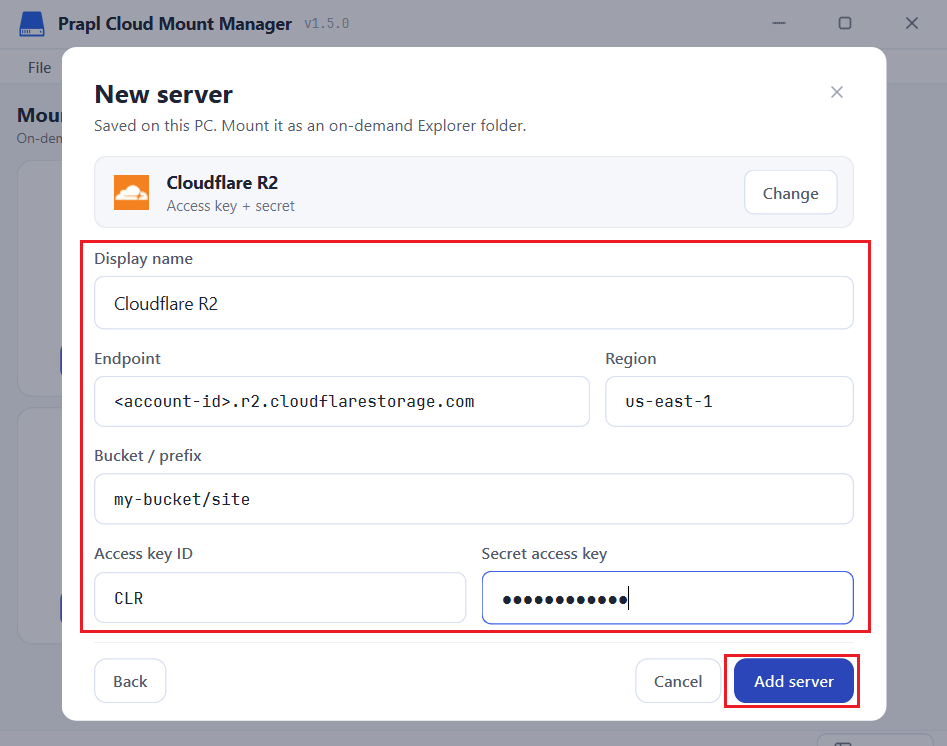
3. Enter the Cloudflare R2 login details and press Add Server.
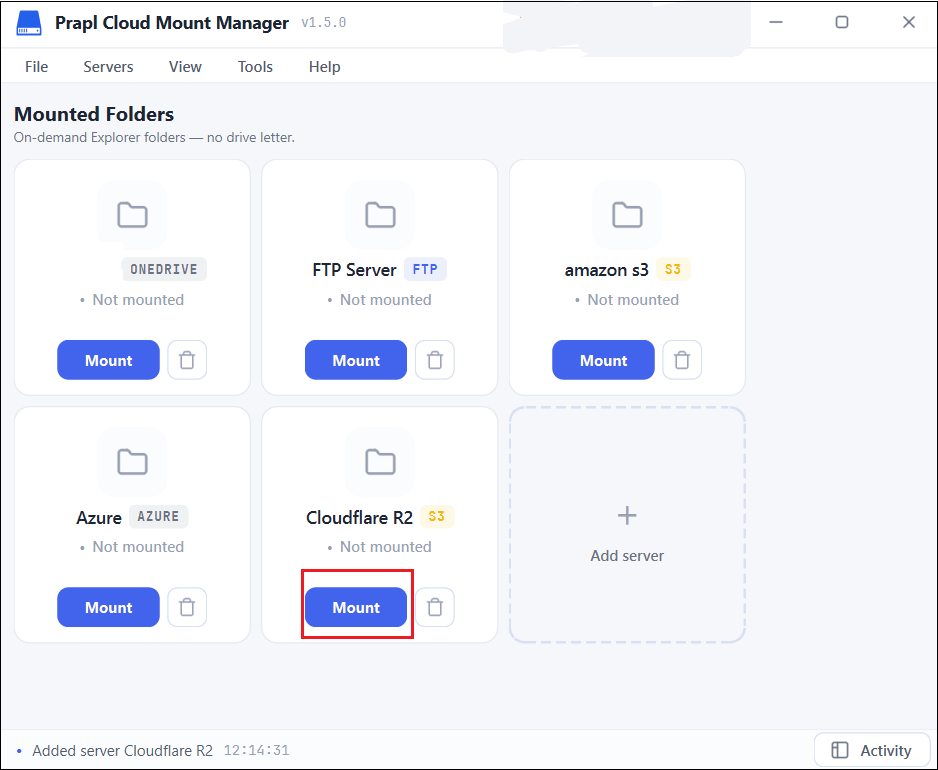
4. After that, click on Mount.
5. Now, open Windows File Explorer and locate the connected Cloudflare R2 folder to access your files.
Conclusion
Cloudflare R2 is designed for object storage, not as a native Windows drive. Therefore, a bucket does not automatically appear in File Explorer after it is created. A connection layer is required to bridge the gap between R2’s S3-compatible storage and the Windows file system.
Here, we have mentioned the two best ways to mount Cloudflare R2 in File Explorer. You can do it manually or use a dedicated mounting application. After the connection is configured, the bucket can be accessed from Windows File Explorer, while the file remains stored in Cloudflare R2.